Restoring an Old Kitchen Table for Under $50
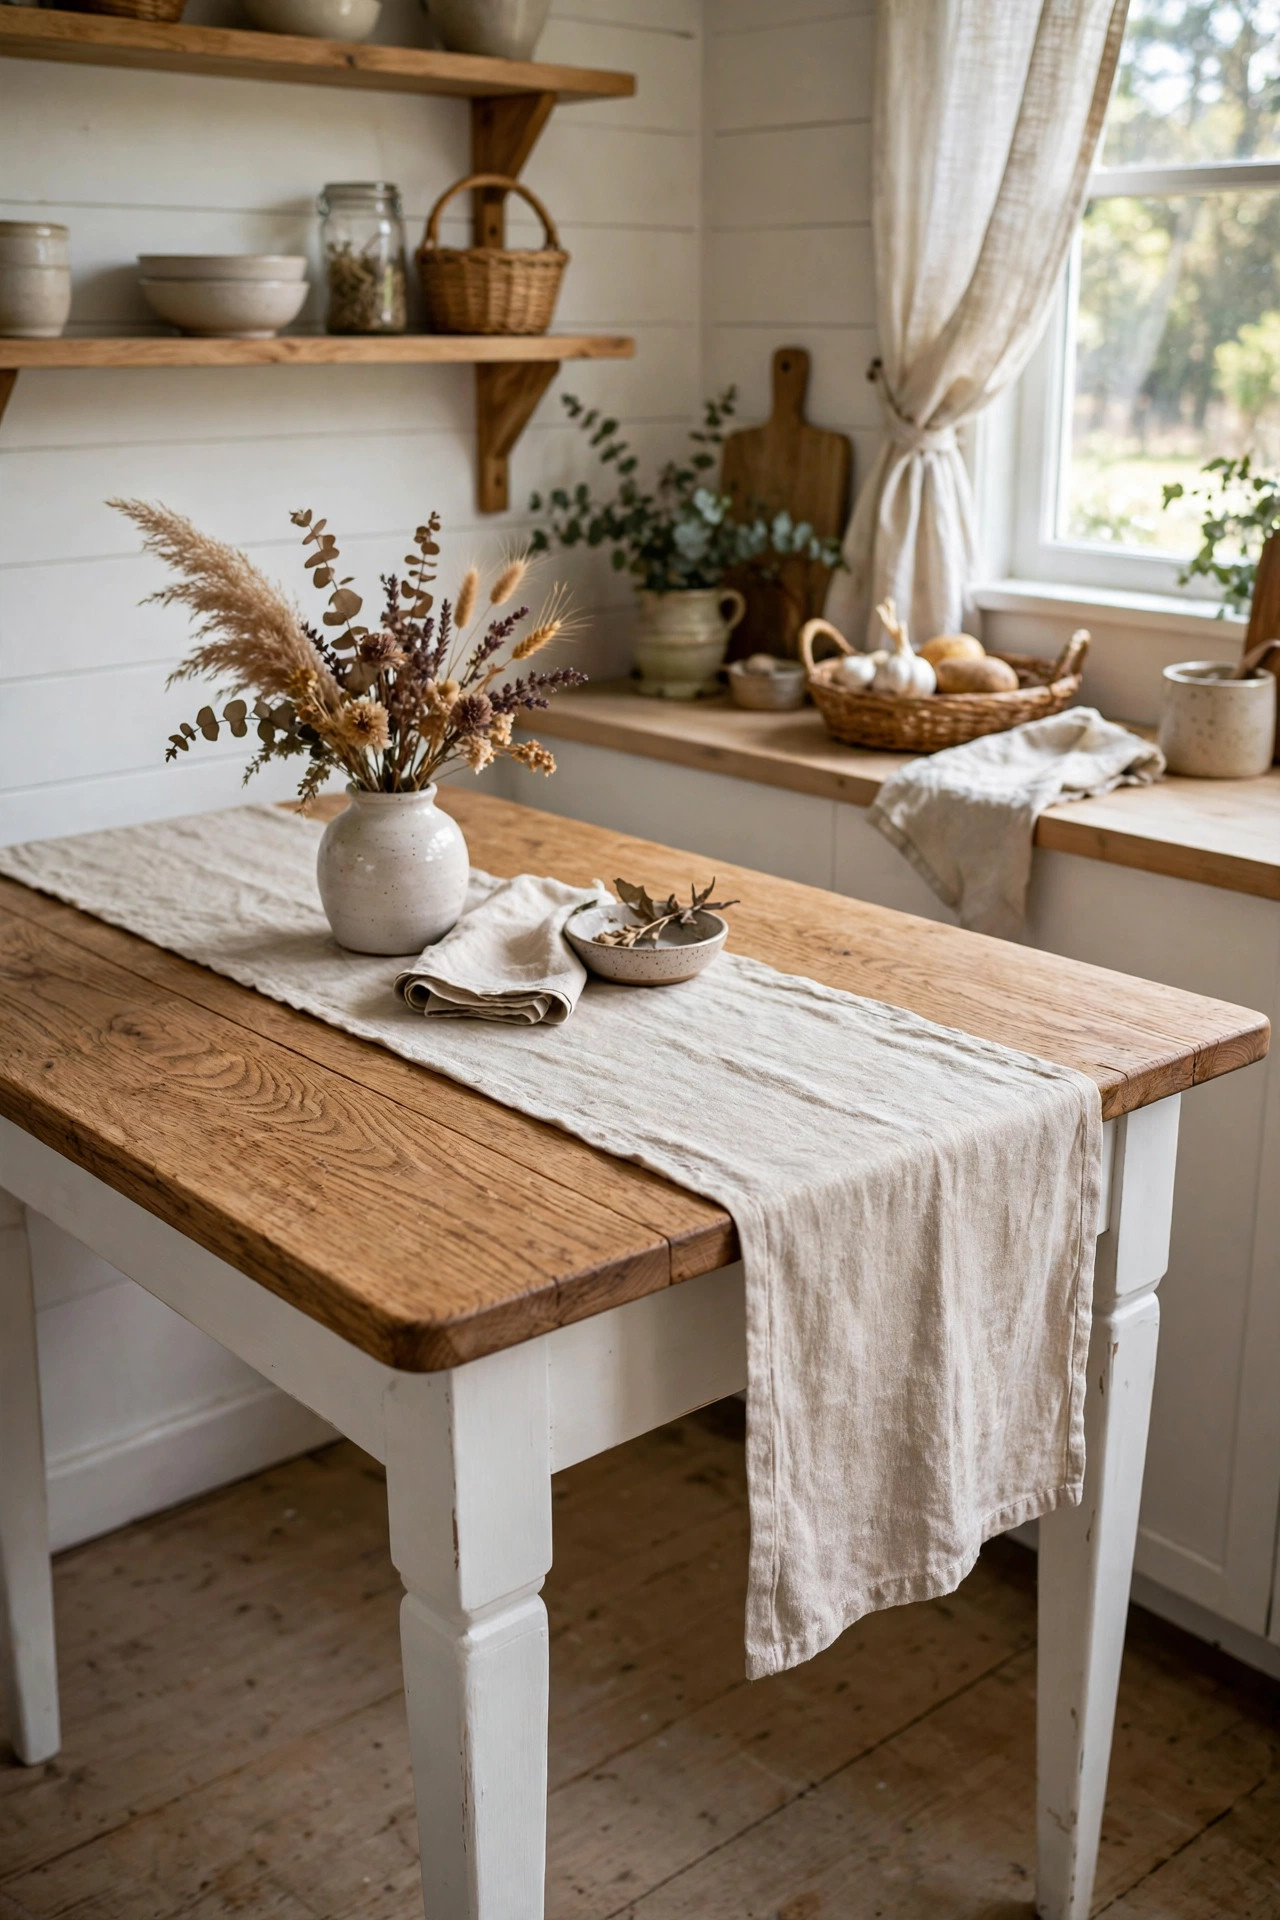
Every neighborhood has one: the old kitchen table sitting on the curb, solid as a rock but ugly as sin. Scratched top, wobbly legs, a finish last fashionable when flip phones were new. Here's what most people don't realize — that table is almost always worth saving. Old tables were built from real wood with real joinery, which makes them better candidates for restoration than most of what you'd buy new for $300.
This restoration cost $44 and took a weekend. The formula is timeless: a natural wood top (sanded and sealed to show the grain) paired with painted legs (which hide a multitude of sins and add contrast). It's the farmhouse two-tone look, achieved with sandpaper and patience instead of a credit card.
Materials You'll Need
- Old wooden kitchen table (curb find / thrifted / already owned) — $0–$20
- Sandpaper assortment (80, 120, 220 grit) — $8
- Wood stain, natural oak (half-pint) — $9
- White chalk-style or enamel paint, quart (legs) — $12
- Clear matte polyurethane (quart) — $14
- Wood glue, damp rags, tack cloth — on hand / $0
Step-by-Step Instructions
- Assess and tighten. Flip the table over. Tighten every bolt and screw; reglue any loose joints with wood glue and clamps. A wobbly table is usually just loose hardware — fix the structure before you touch the finish.
- Strip the top. Sand the tabletop with 80-grit to remove the old finish, then 120, then 220, always with the grain. The top needs to go back to bare wood so the stain absorbs evenly. Legs just need a scuff-sand since they'll be painted.
- Clean thoroughly. Vacuum the dust, then wipe every surface with a tack cloth or damp rag. Dust under the finish is the number one cause of a rough final result.
- Stain the top. Apply natural oak stain with a rag, working with the grain. Wipe off excess after 5–10 minutes. One coat keeps it light and Scandinavian; two coats warm it up. Let dry 24 hours.
- Paint the legs and apron. Two thin coats of white paint on the legs, skirt, and underside. Painting the base (instead of staining everything) is what gives the classic two-tone farmhouse look — and paint hides old dents far better than stain.
- Seal everything. Three thin coats of matte polyurethane on the top (it takes the abuse), two on the painted base. Lightly sand with 220-grit between coats for a furniture-smooth finish.
- Cure before use. The table is usable in 48 hours but the finish keeps hardening for weeks. Use placemats and coasters for the first month — future you will be grateful.
Budget Breakdown
| Item | Cost |
|---|---|
| Old kitchen table (already owned) | $0 |
| Sandpaper assortment | $8 |
| Natural oak stain (half-pint) | $9 |
| White paint, quart (legs) | $12 |
| Matte polyurethane (quart) | $14 |
| Glue, rags, tack cloth | $0 (on hand) |
| Total | $44 |
Before & After
Before: a dark, orangey table with a top mapped in scratches and water rings, legs loose enough to notice when you leaned on it. It had been in the family for years and was one wobble away from the curb.
After: a light, airy farmhouse table — honey-toned oak top glowing under matte sealer, crisp white legs, rock solid. It looks like the $400 tables at home stores, except the wood is thicker and the joints are better. It now hosts every meal and every craft project in the house.
The two-tone choice was the key decision. Staining everything would have been fine; painting everything would have been fine. But the natural top + painted base combination looks custom and intentional in a way that single-finish tables rarely do — and it let me hide the legs' dents under paint while showing off the top's grain.
Tips for Table Restoration
- Structure first, beauty second. No finish survives a wobbly frame. Tighten and reglue before you sand a single inch.
- Don't skip grits. Jumping from 80 to 220 leaves visible scratches. The progression (80 → 120 → 220) is what makes the top feel like glass.
- Wear a dust mask. Old finishes can contain who-knows-what. Sand outdoors or in a ventilated garage with a proper mask, not a paper dust mask.
- Test your stain. Stain the underside of the tabletop first to preview the color on your specific wood.
- Matte, not glossy. Matte or satin polyurethane looks modern and hides imperfections; high-gloss shows every flaw and screams 1990s.
Frequently Asked Questions
- Can I restore a table with a veneer top?
- Yes, but sand very gently — veneer is a thin layer and aggressive sanding burns right through it. Use 120-grit or finer only, and consider painting the top instead of staining if the veneer is damaged; paint hides flaws stain can't.
- How do I know if an old table is worth restoring?
- Check three things: solid wood (heavy, grain visible on edges), sturdy joinery (no cracked legs or broken stretchers), and a flat top (sight down it like a rifle barrel — warping is hard to fix). If all three check out, restore it.
- Is polyurethane food-safe for a kitchen table?
- Once fully cured (about 30 days), polyurethane is considered food-safe for incidental contact — plates, placemats, serving dishes. Don't chop directly on it or serve food straight on the surface; use a cutting board as you normally would.