DIY Painted Accent Wall on a Budget
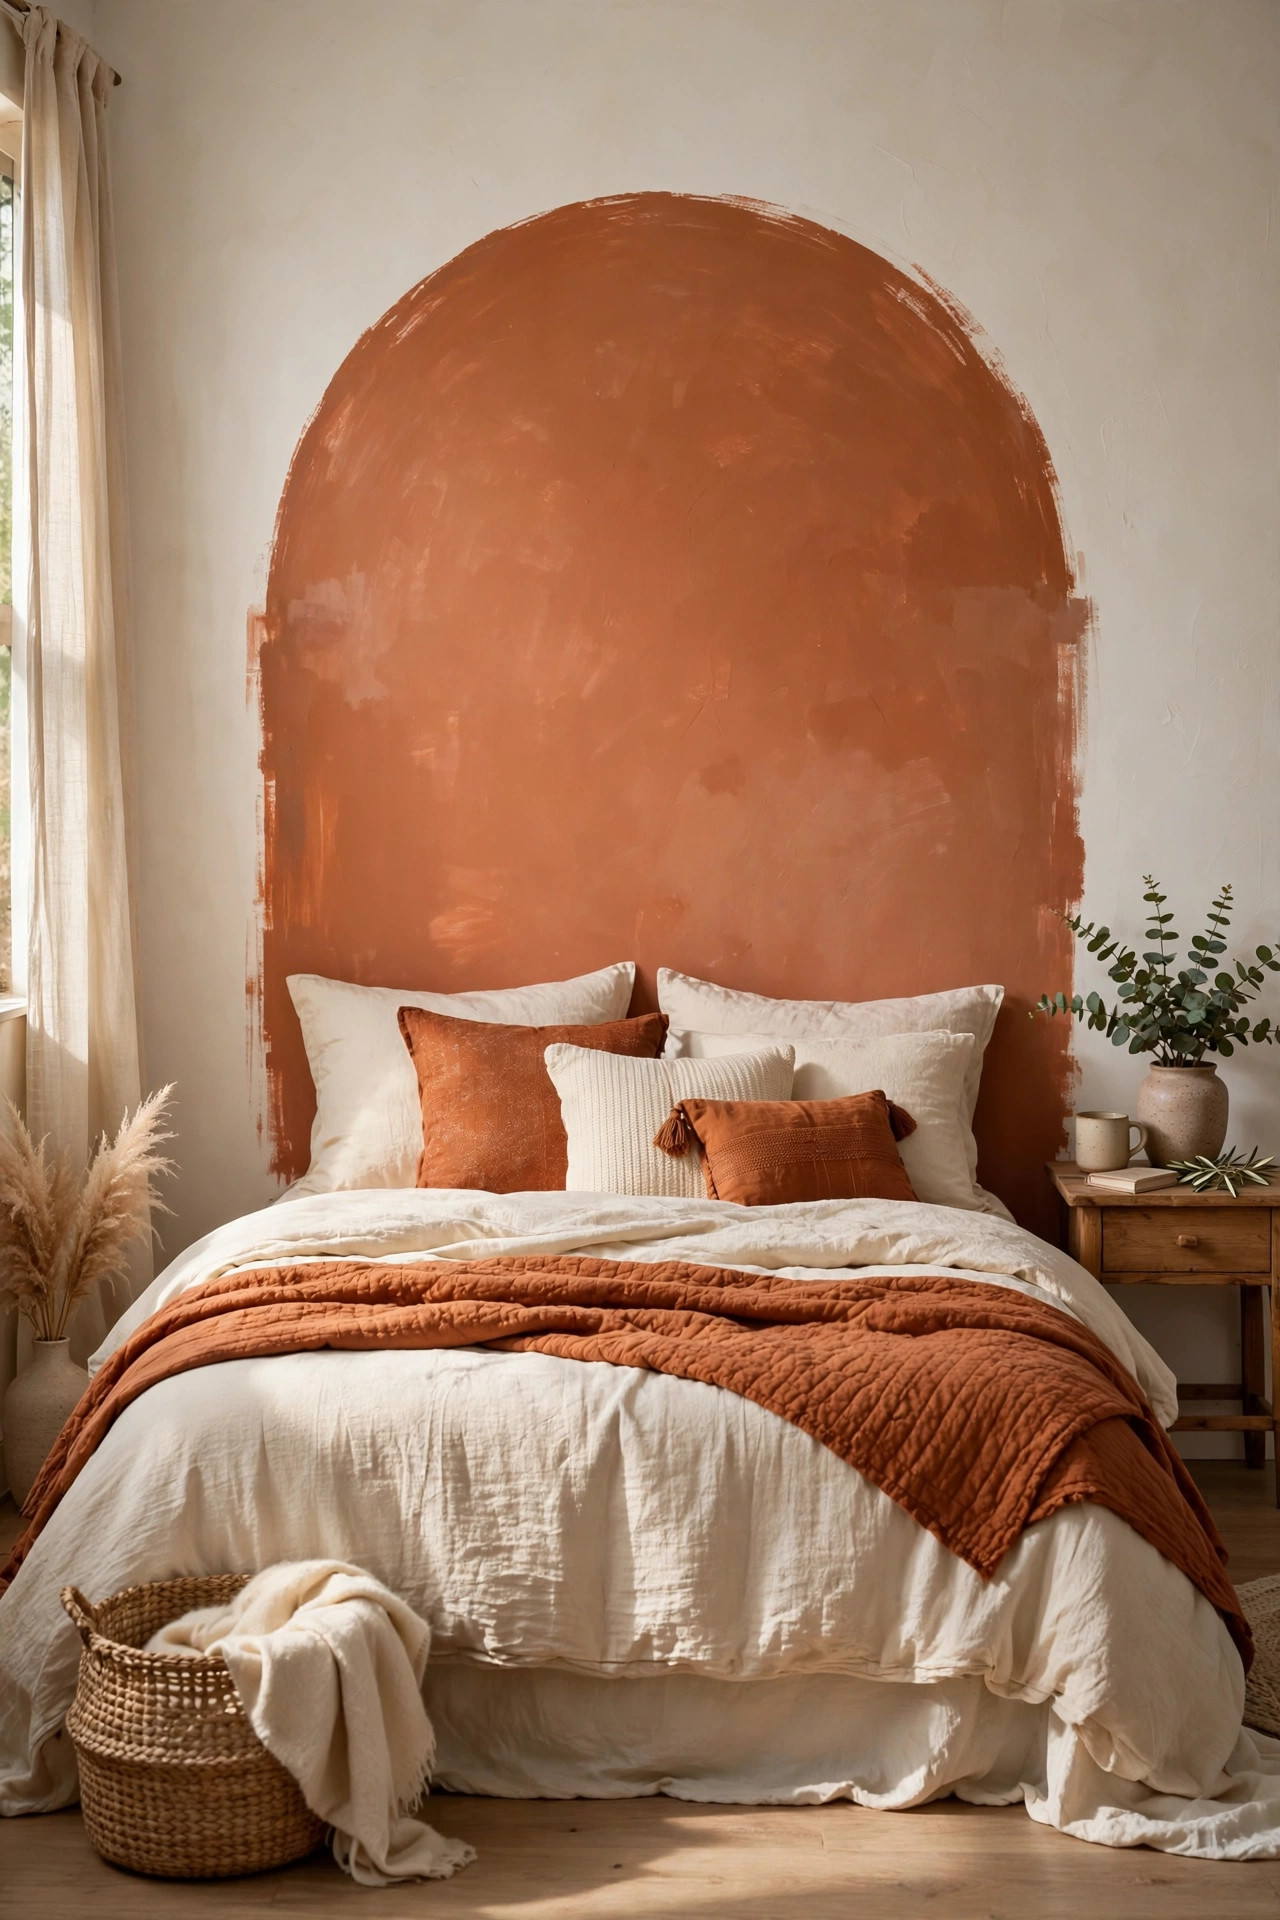
If you want the single highest-impact project per dollar in all of DIY, it's this one: a painted accent wall. One quart of paint, one roll of painter's tape, one afternoon — and a room that looks like you hired a designer. The painted arch, in particular, has become the defining DIY motif of the decade, and for good reason: it's sculptural, it's forgiving, and it frames furniture beautifully.
This tutorial covers the terracotta arch behind a bed, but the technique works for any shape — color-blocked rectangles, half-walls, oversized circles. The skills are the same: marking, taping, cutting in, and rolling. Master them here and you'll use them on every paint project for the rest of your life.
Materials You'll Need
- 1 quart interior wall paint, terracotta (eggshell finish) — $16
- Painter's tape, 1.5-inch (1 roll) — $8
- Small roller + tray, angled sash brush — $10
- Pencil, string, and a thumbtack (for drawing the arch) — on hand / $0
- Drop cloth or old sheet — on hand / $0
Step-by-Step Instructions
- Choose your wall and shape. The wall behind a bed, sofa, or desk gets the most visual payoff. For an arch: decide the width (usually the width of the furniture plus a foot on each side) and the height (typically 6–7 feet, ending in a half-circle).
- Draw the arch. Mark the arch's two bottom corners with pencil. For the curve: pin a thumbtack at the midpoint between them at your chosen height, tie a string to it cut to half the arch width, tie a pencil to the other end, and swing the arc. Connect the arc's ends down to the floor line with straight vertical pencil lines.
- Tape just outside the lines. Lay painter's tape so its inner edge follows your pencil marks exactly — you'll paint up to the tape, not over it. Press the tape edge down firmly with a credit card to prevent bleed.
- Seal the tape edge. Here's the pro trick: paint a thin line of your existing wall color right over the tape edge and let it dry. Any bleed-through will be wall-colored, and your accent color line will be razor sharp.
- Cut in, then roll. Use the angled brush to paint along the taped edges (cutting in), then fill the interior with the roller. Two thin coats, letting the first dry to the touch between coats.
- Remove tape at the right moment. Pull the tape off while the second coat is still slightly tacky — not fully dry — pulling at a 45-degree angle away from the painted area. This gives the crispest line.
- Touch up and style. Fix any tiny bleeds with a small artist's brush and wall paint. Push the bed or furniture back into place so it sits centered in the arch, and step back.
Budget Breakdown
| Item | Cost |
|---|---|
| Terracotta paint (quart) | $16 |
| Painter's tape | $8 |
| Roller, tray, sash brush | $10 |
| Pencil, string, drop cloth | $0 (on hand) |
| Total | $34 |
Before & After
Before: a plain cream bedroom wall with a bed pushed against it — perfectly fine, perfectly forgettable. The bed looked like it was floating in empty space with nothing anchoring it.
After: the terracotta arch rises behind the bed like a sunrise, giving the whole sleeping area intention and warmth. The bed finally looks "placed" rather than parked. Guests ask if it's wallpaper — nobody guesses it was a $16 quart of paint and a piece of string.
The color choice matters more than the shape. Terracotta is warm without being loud, and it plays beautifully with cream bedding, wood tones, and plants. If terracotta isn't your thing, the same technique in sage green, dusty blue, or warm charcoal is equally striking.
Tips for Crisp Painted Shapes
- The wall-color seal coat is everything. Painting wall color over the tape edge before your accent color is the difference between Pinterest-crisp and DIY-blurry.
- Buy quality tape. Cheap tape bleeds and tears paint on removal. The mid-range blue or green tapes are worth the extra two dollars.
- Pull tape while tacky. Fully dried paint can peel up with the tape; wet paint smears. Tacky — about 30–60 minutes after the final coat — is the sweet spot.
- Eggshell finish for walls. Flat shows every touch; semi-gloss looks plasticky on a big shape. Eggshell hides roller texture and wipes clean.
- Step back often. Check the shape from the doorway every 15 minutes. Small wobbles invisible up close scream from across the room.
Frequently Asked Questions
- I'm terrible at drawing. Can I still do an arch?
- Yes — that's the beauty of the string-and-tack method. The string does the drawing for you; you're just tracing. And small imperfections read as "hand-painted charm," which is the whole aesthetic.
- Will one quart really cover an arch?
- For a typical bed-width arch, yes — a quart covers about 100 square feet and most arches are 40–60. If you're going very large or very dark over white, buy the quart and keep the receipt; you can grab a second if needed.
- Is a painted arch too trendy? Will it look dated?
- Arches have been in architecture for millennia — the current trend just rediscovered them. And at $34, even if you tire of it in three years, repainting is the cheapest style change in your home.